

Whether it’s making the photo more fun, or adjusting something that did not look right in a photo, we often need to change the color of an object in the image, right? It seems like something very difficult to do, but it really isn’t! ✨✨

Let’s go step by step:
- On Photoshop, open the image you want to edit.

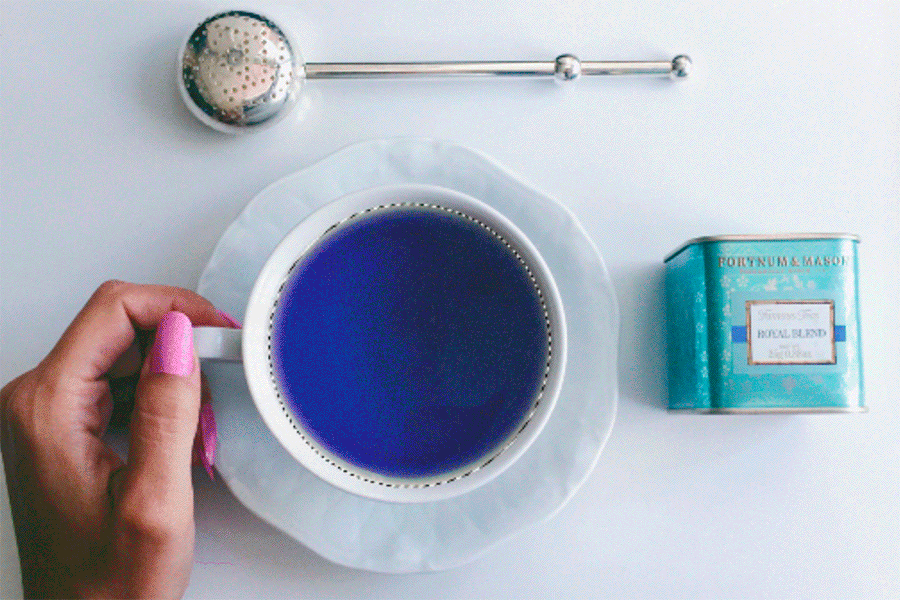
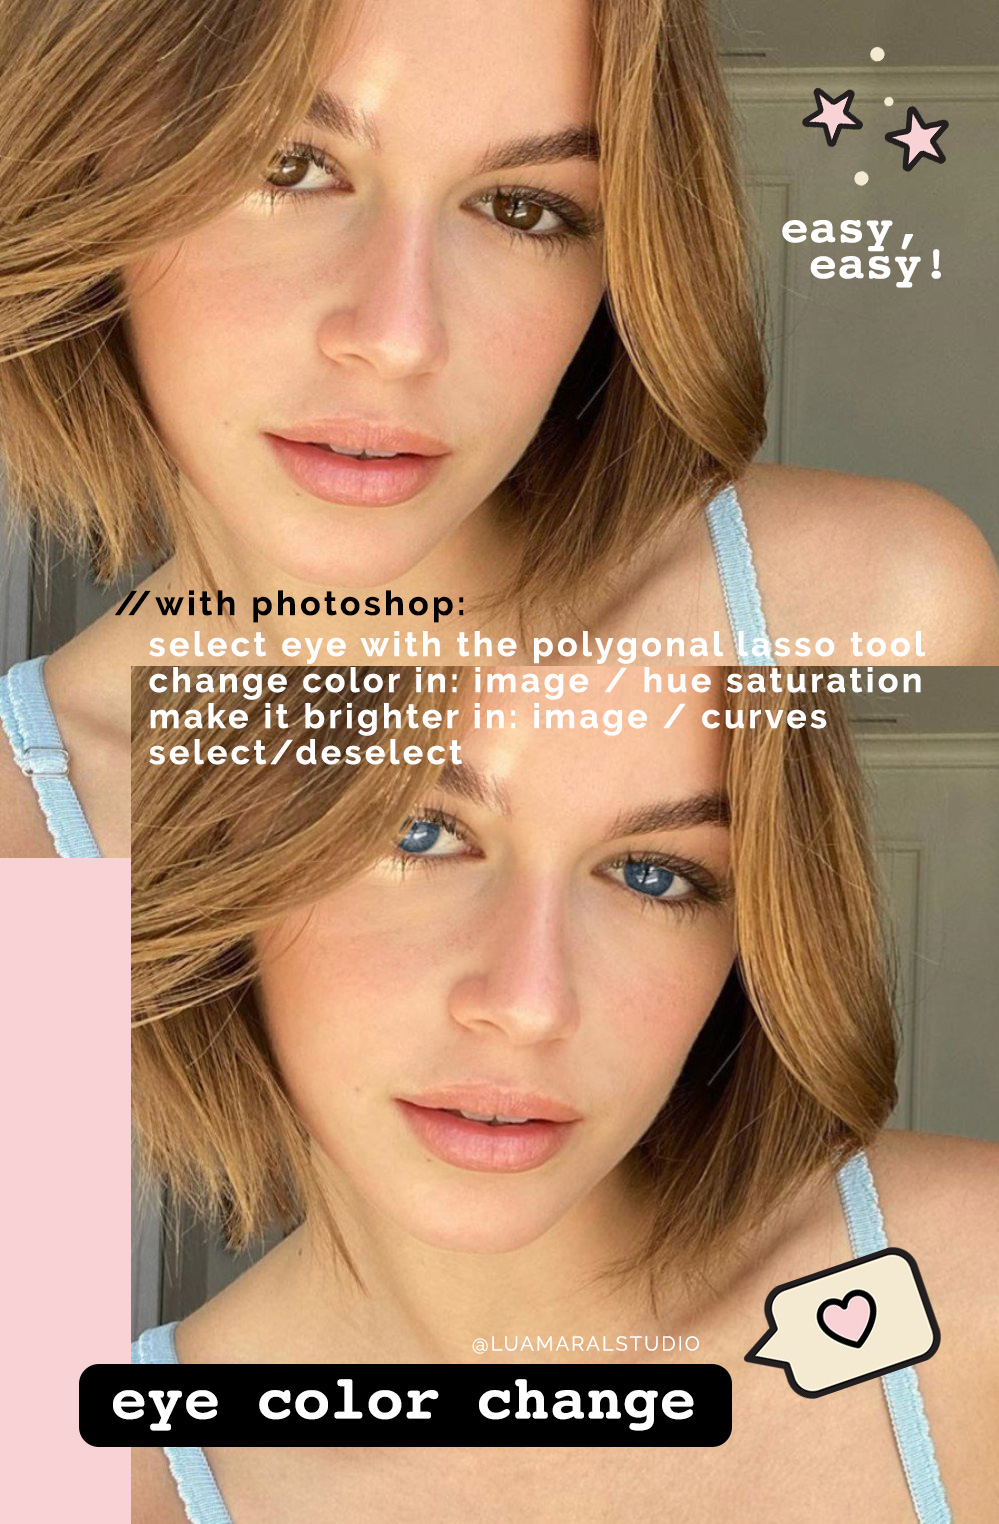
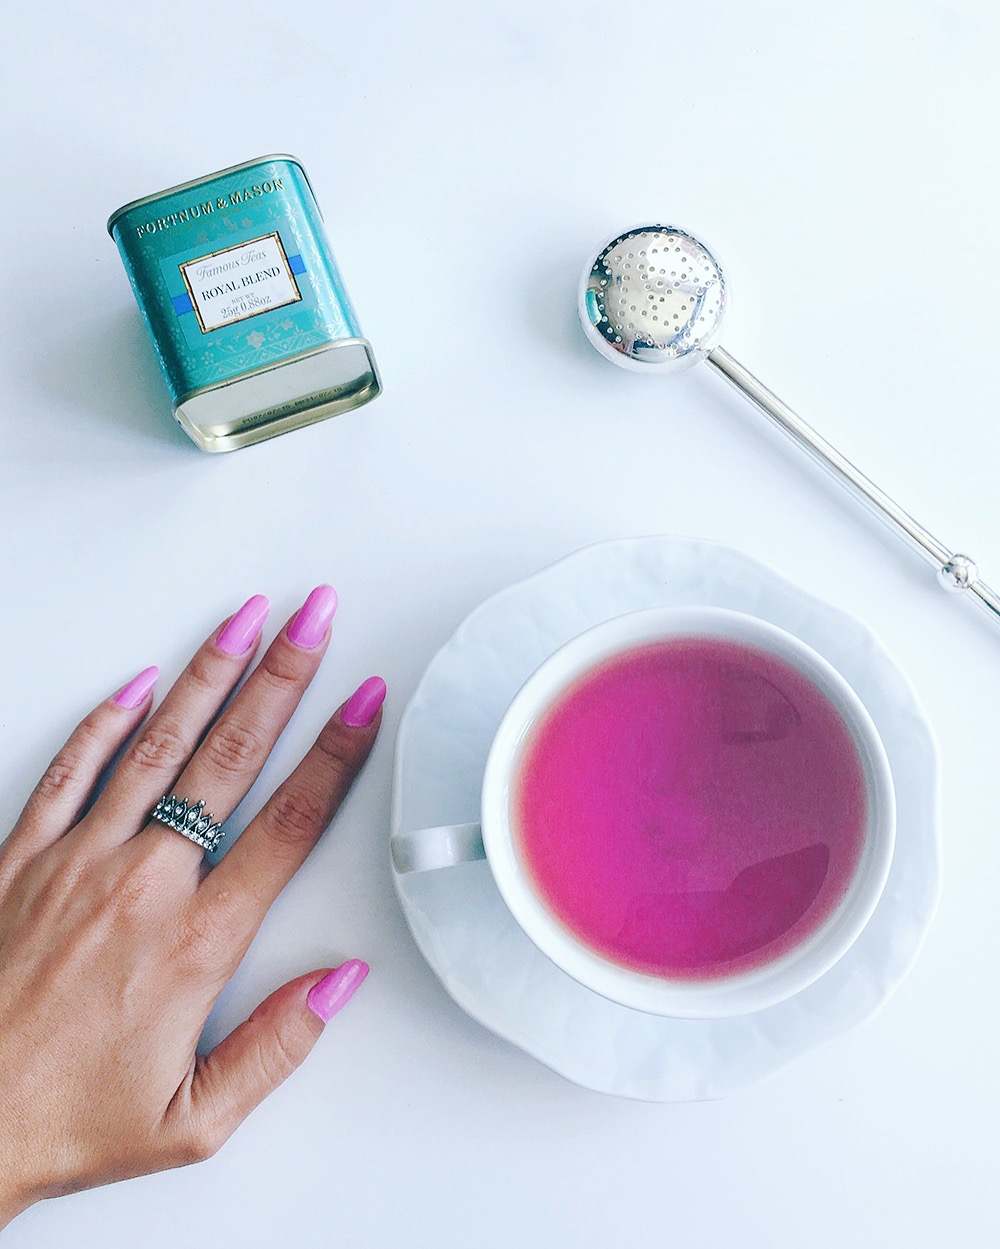
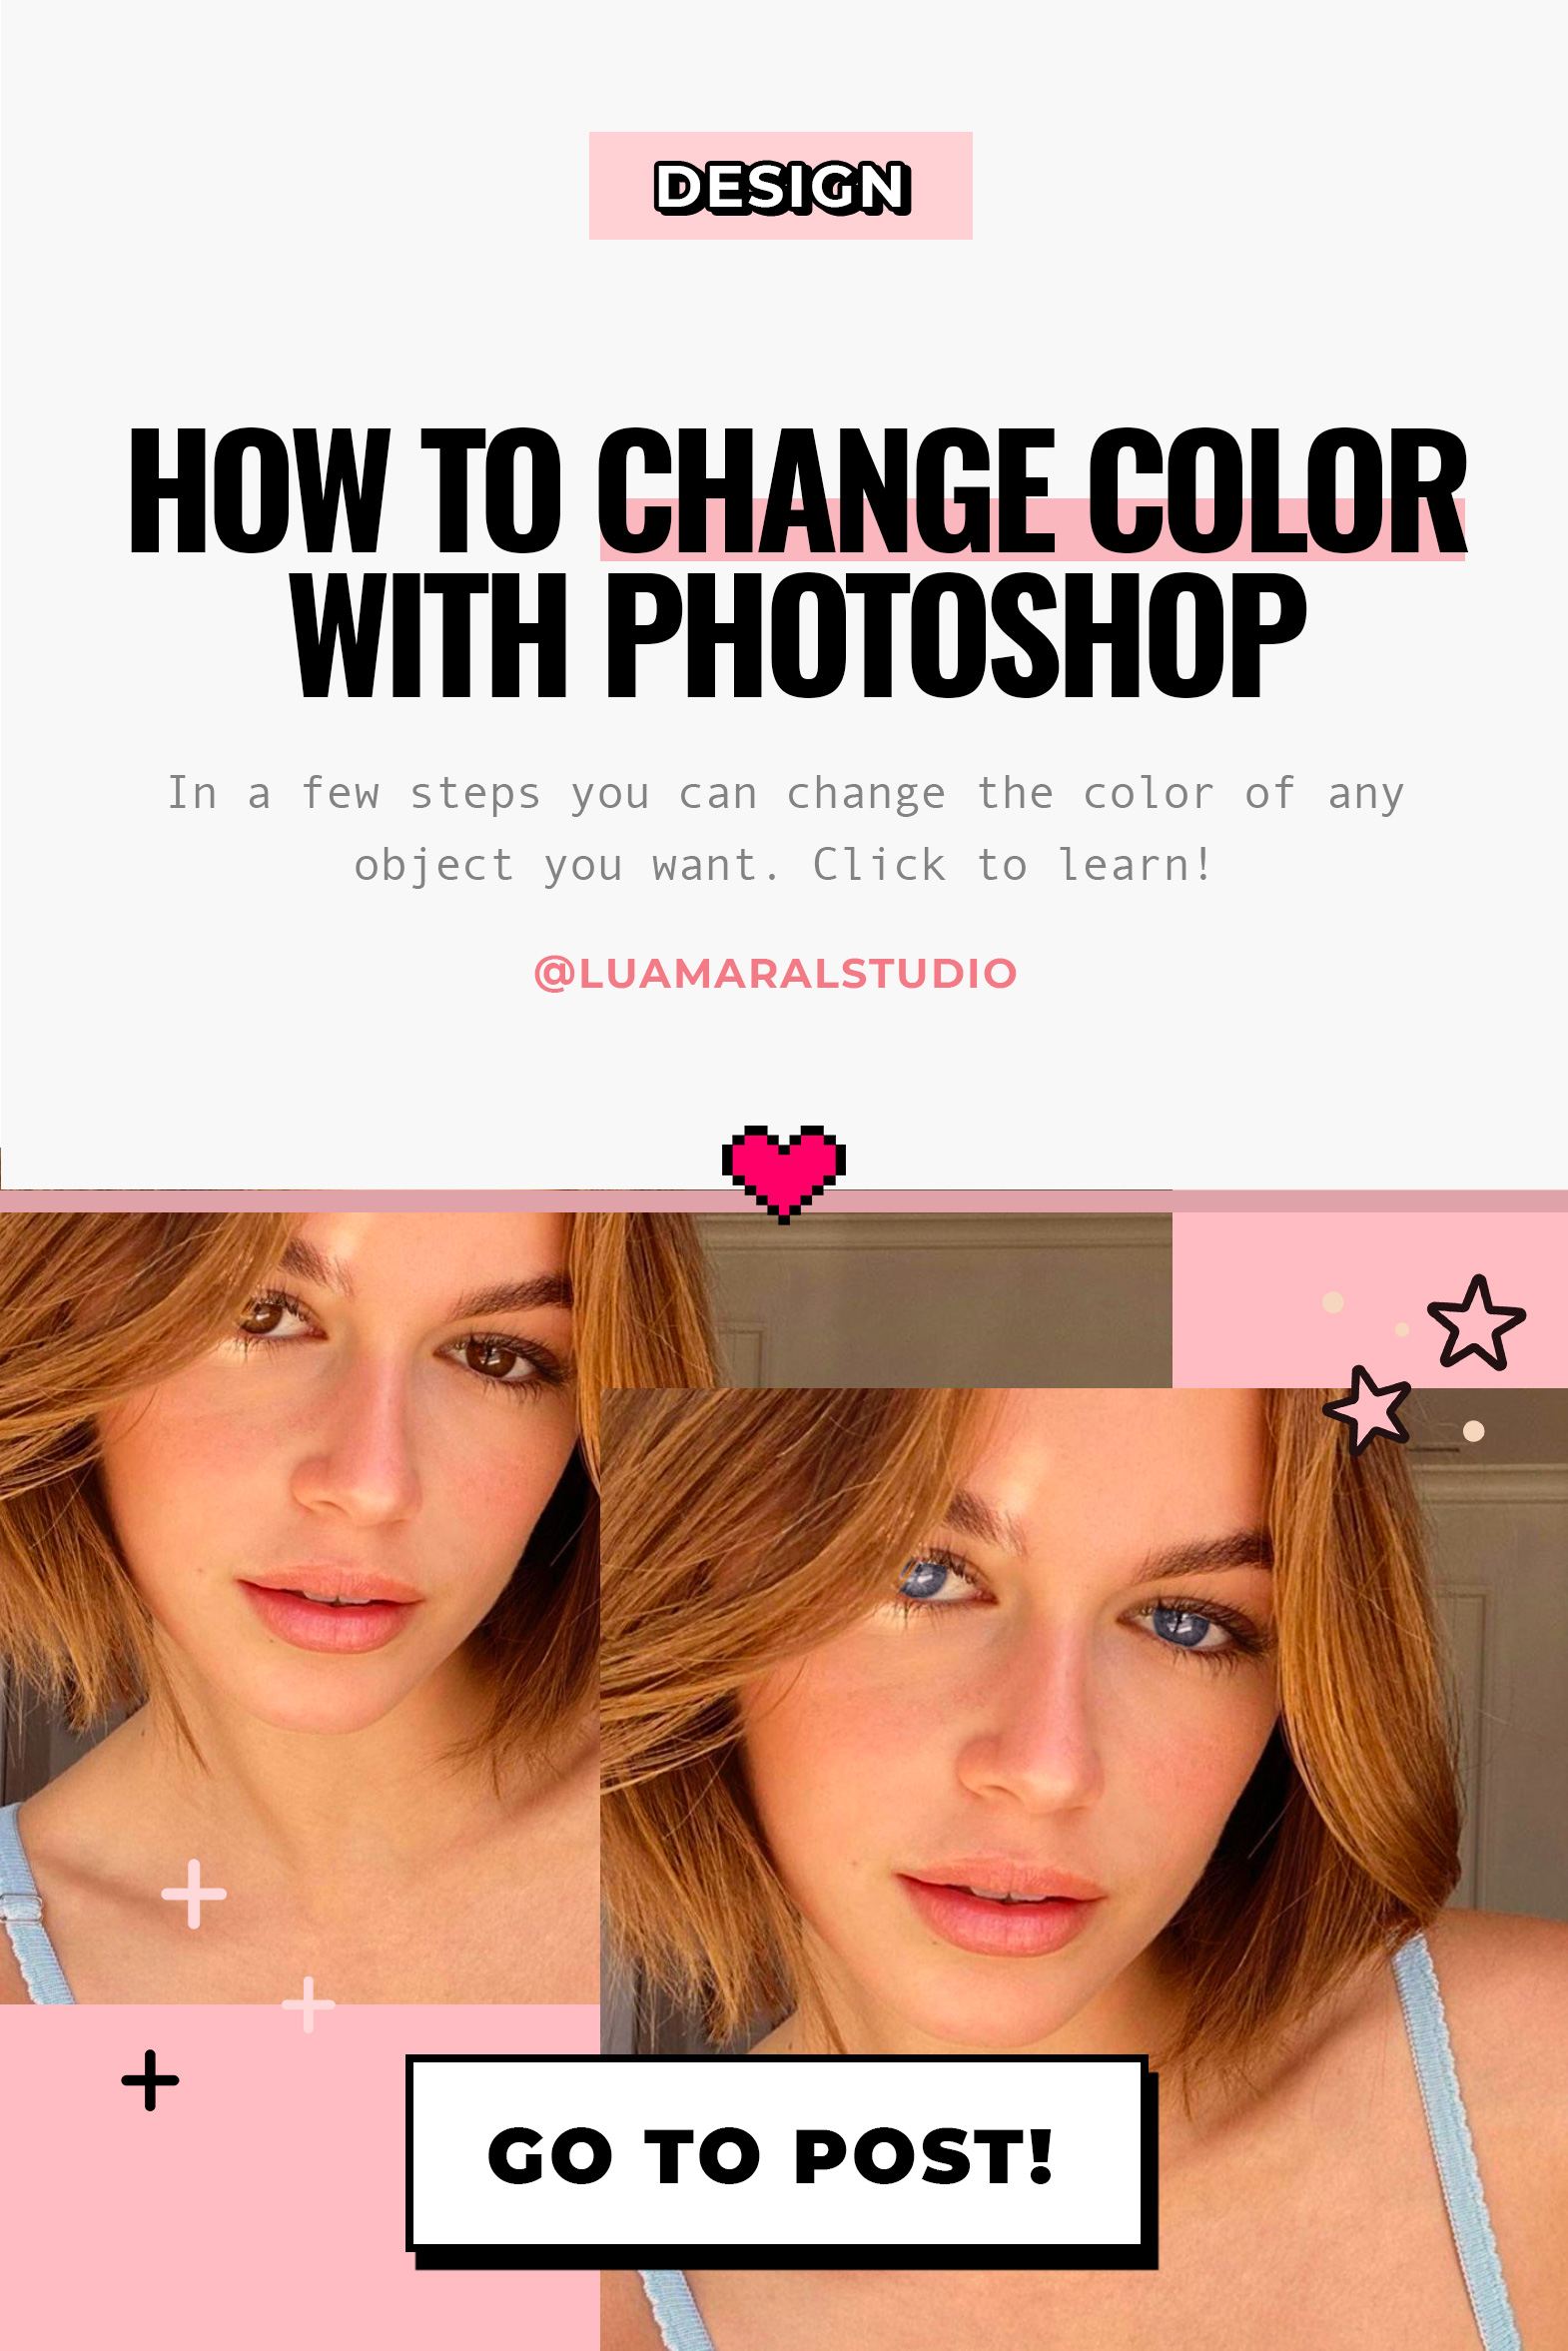
- Pick the most appropriate selection tool and mark the desired area. In most cases, I need to select an object that has organic shape, (like Kaia’s eyes) so I use the Polygonal Lasso Tool. But in the picture below, I will use the elliptical sign, since I wanna change the color of the tea that is in the round cup. (ps. Sorry the screenshots below are in portuguese. I think it’s possible to understand, though 🙂

- Next, go to Image / Adjustments / Hue Saturation. By changing the hue of the selected object, you will see how it changes the color before your eyes. It’s super easy!

- If you prefer a more subtle change, instead of Hue, you can go into Image / Adjustments / Color Balance. And one of the ones I like the most: Image / Adjustments / Replace color, which allows you to select (within the selection already made), a specific color to change. In this case you can control the intensity of the change better 😉
Result:
I hope this is useful! Let me know if you have any questions 🙂
Beijos,
Lu


&url=https://www.theaesthetic.shop/2019/12/how-to-change-the-color-of-and-object-with-photoshop/&media=https://www.theaesthetic.shop/wp-content/uploads/2024/03/Vanilla-Girl-aesthetic-stars-Instagram-highlight-covers-1.jpg)
&url=https://www.theaesthetic.shop/2019/12/how-to-change-the-color-of-and-object-with-photoshop/&media=https://www.theaesthetic.shop/wp-content/uploads/2024/03/Vanilla-Girl-aesthetic-photograph-Instagram-highlight-covers-1.jpg)
&url=https://www.theaesthetic.shop/2019/12/how-to-change-the-color-of-and-object-with-photoshop/&media=https://www.theaesthetic.shop/wp-content/uploads/2024/03/Vanilla-Girl-aesthetic-doodle-Instagram-highlight-covers-1.jpg)
&url=https://www.theaesthetic.shop/product/30-perfect-pink-aesthetic-high-resolution-digital-images-with-editable-canva-template/&media=https://www.theaesthetic.shop/wp-content/uploads/2023/08/30-Perfect-Pink-aesthetic-high-resolution-DIGITAL-images-with-editable-Canva-template-2.jpg)